
Understanding Nodes
Nodes are the fundamental building blocks of your Armox workflows. Each node performs a specific function and can be connected to other nodes to create powerful content generation pipelines.
What Are Nodes?
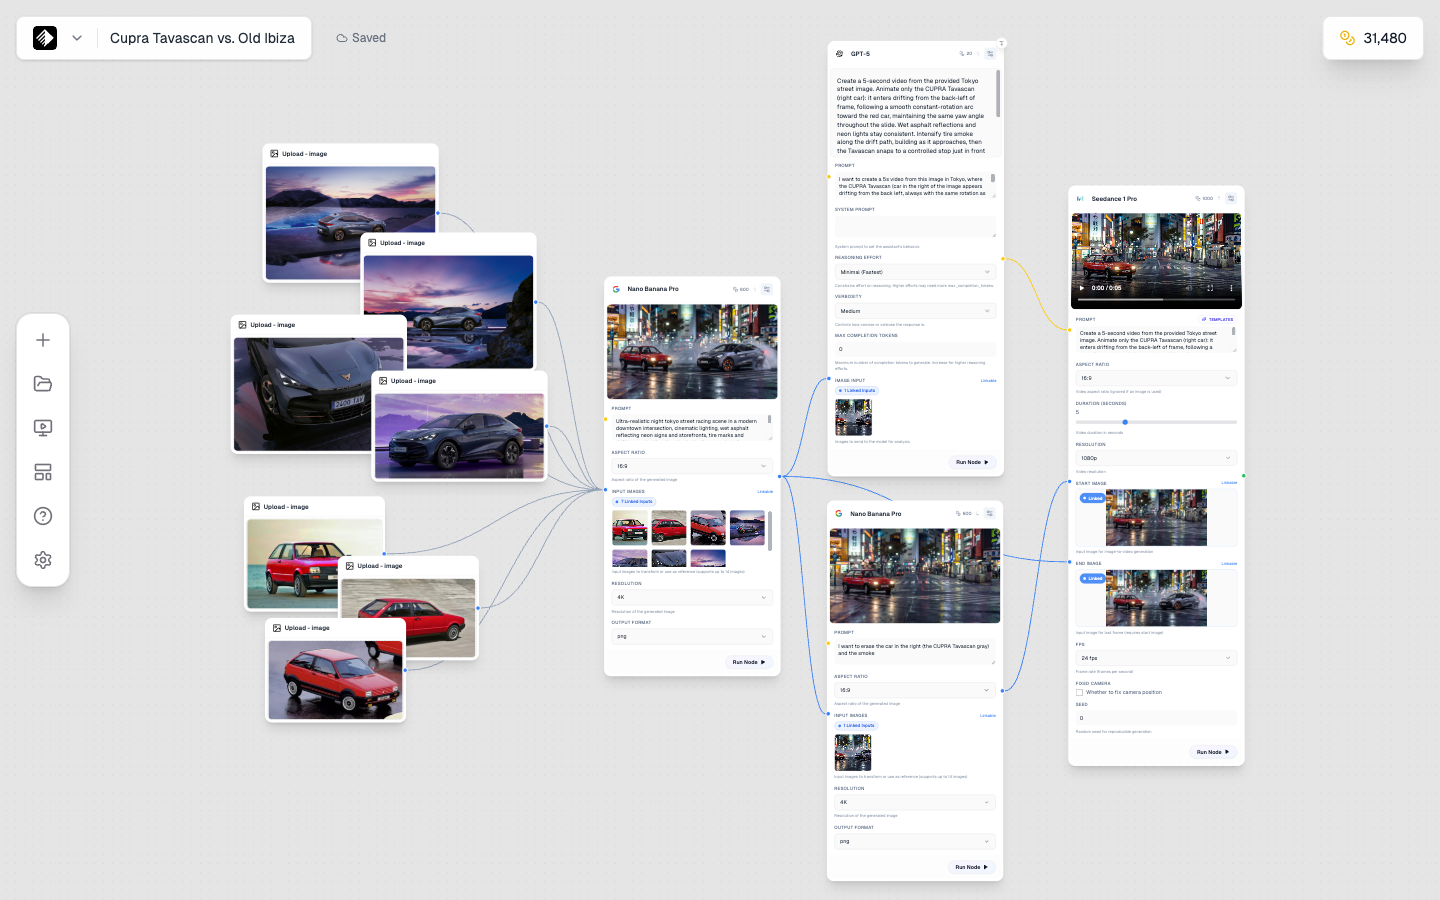
A complex workflow showing multiple nodes connected together: Upload nodes, Image generation, Text generation, and Video creation.
In Armox, a node is a single unit of functionality in your Canvas workflow. Each node:
- Has a specific purpose (text input, image generation, etc.)
- Has inputs (left side) and outputs (right side)
- Can be connected to other nodes
- Has settings you can configure
Think of nodes like building blocks—you connect them together to create complex creative workflows.
Node Types Overview
Armox has six main types of nodes:
| Node Type | Purpose | Input | Output |
|---|---|---|---|
| Text | Write prompts or generate text | Text | Text |
| Image | Generate images with AI | Text, Image | Image |
| Video | Generate videos with AI | Text, Image, Video | Video |
| Audio | Generate music or speech | Text, Audio | Audio |
| Upload | Add your own files | None | Image, Video, or Audio |
| Tool | Process and enhance content | Varies | Varies |
Text Nodes
Text nodes are where you write prompts or generate text content.

A Text node using GPT-5 for AI-powered text generation.
Two Modes
- Manual Mode — Type your own text directly
- AI Mode — Use an AI model to generate or refine text
Use Cases
- ✍️ Writing prompts for image generation
- 📝 Generating marketing copy
- 🔄 Refining or expanding ideas
- 💬 Creating captions or descriptions
Settings
- Mode Toggle — Switch between manual and AI
- Model — Choose AI model (GPT-5, Claude, Gemini, etc.)
- System Prompt — Guide the AI's behavior
Available Text Models
| Model | Best For | Learn More |
|---|---|---|
| GPT-5.4 | Default frontier model, complex coding and reasoning | GPT-5.4 Reference |
| Gemini 3.1 Pro | Balanced multimodal reasoning with medium thinking | Gemini 3.1 Pro Reference |
| Claude Opus 4.6 | Deep analysis and premium long-form quality | Claude Opus 4.6 Reference |
| GPT-5 | Complex reasoning, coding, creative writing | GPT-5 Reference |
| Gemini 2.5 Flash | Fast responses, balanced performance | Gemini 2.5 Flash Reference |
| Claude 4.5 Sonnet | Nuanced writing, analysis, safety | Claude 4.5 Sonnet Reference |
| DeepSeek V3.1 | Code generation, cost-effective | DeepSeek V3.1 Reference |
| Grok 4 | Real-time info, conversational | Grok 4 Reference |
| Llama 3 70B | Open-source, high performance | Llama 3 70B Reference |
| Llama 3 8B | Lightweight, fast | Llama 3 8B Reference |
📚 See all text models: Text Models Reference
Output
Text nodes output text (🟡 yellow connection) that can flow to:
- Image nodes (as prompts)
- Video nodes (as prompts)
- Audio nodes (as text-to-speech input)
- Other text nodes (for chaining)
Image Nodes
Image nodes generate images using AI models.
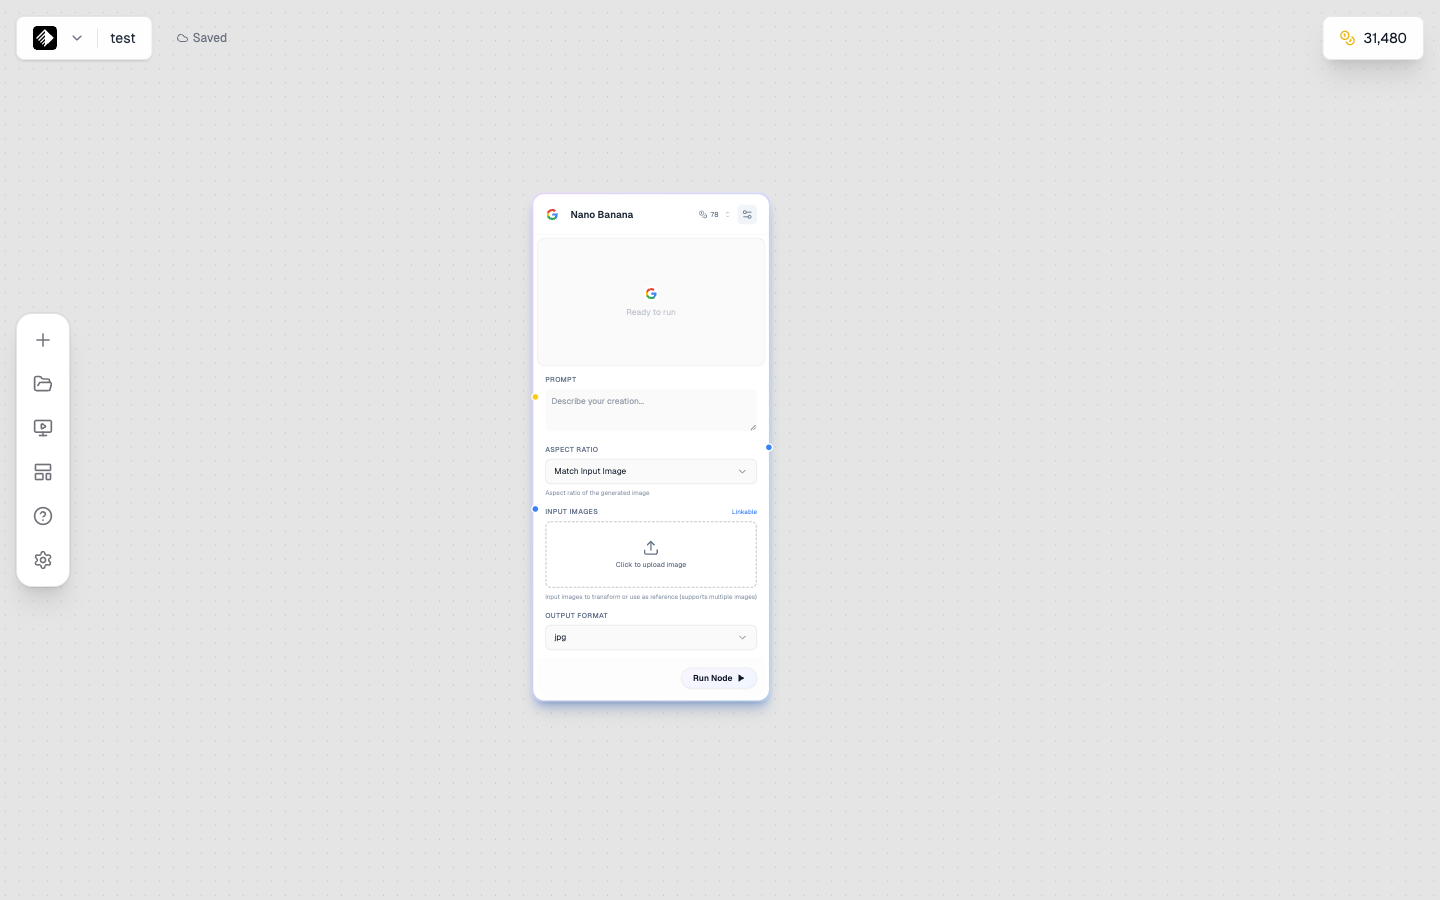
An Image node with the Nano Banana model selected for image generation.
Capabilities
- 🎨 Text-to-image generation
- 🖼️ Image-to-image transformation
- 📐 Multiple aspect ratios
- 🎭 Various styles and aesthetics
Settings
| Setting | Description |
|---|---|
| Model | AI model (Flux, Nano Banana, SDXL, etc.) |
| Aspect Ratio | Output dimensions (1:1, 16:9, 9:16, etc.) |
| Guidance Scale | How closely to follow the prompt |
| Style | Preset styles (varies by model) |
Available Image Models
| Model | Best For | Learn More |
|---|---|---|
| Nano Banana Pro | Highest quality, Google's flagship | Nano Banana Pro Reference |
| Nano Banana | Fast, high-quality generation | Nano Banana Reference |
| Flux 2 Pro | Professional quality, versatile | Flux 2 Pro Reference |
| Flux 2 Flex | Flexible, balanced performance | Flux 2 Flex Reference |
| Flux 1.1 Pro Ultra | Ultra high resolution | Flux 1.1 Pro Ultra Reference |
| Seedream 4.5 | Artistic styles, anime | Seedream 4.5 Reference |
| Wan 2.2 Image | Realistic, detailed imagery | Wan 2.2 Image Reference |
| Grok 2 Image | Creative, fast generation | Grok 2 Image Reference |
| Qwen Image | Vision-language, multimodal | Qwen Image Reference |
| Stable Diffusion XL | Open-source, customizable | SDXL Reference |
| Flux Kontext Max | Context-aware editing | Flux Kontext Max Reference |
📚 See all image models: Image Models Reference
Inputs
- Prompt (required) — Text describing the desired image
- Reference Image (optional) — Image for style or content reference
Output
Image nodes output an image (🔵 blue connection) that can flow to:
- Video nodes (for image-to-video)
- Tool nodes (for processing)
- Other image nodes (for chaining)
Video Nodes
Video nodes create AI-generated videos.
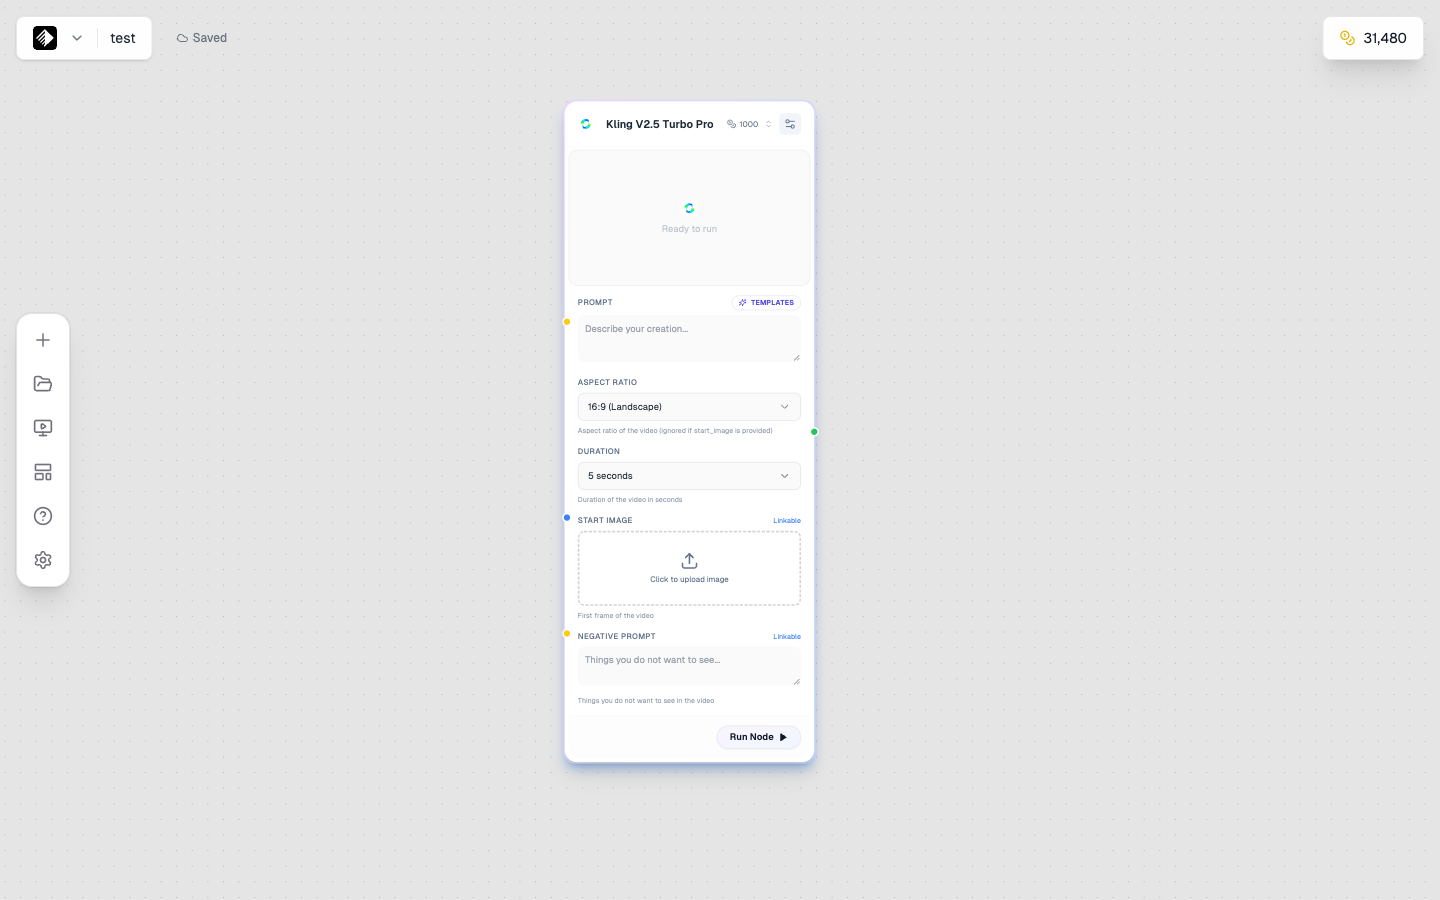
A Video node using Kling V2.5 Turbo Pro for high-quality video generation.
Capabilities
- 📝 Text-to-video generation
- 🖼️ Image-to-video animation
- 🎬 Various durations and resolutions
- 🔊 Some models include audio
Settings
| Setting | Description |
|---|---|
| Model | AI model (Kling, Veo, Seedance, Sora, etc.) |
| Duration | Video length (5s, 10s, etc.) |
| Resolution | Output quality |
| FPS | Frames per second |
Available Video Models
| Model | Best For | Learn More |
|---|---|---|
| Kling 2.6 Pro | Cinematic quality, long duration | Kling 2.6 Pro Reference |
| Kling V2.5 Turbo Pro | Fast, high-quality video | Kling V2.5 Turbo Pro Reference |
| Veo 3.1 | Google's flagship, highest quality | Veo 3.1 Reference |
| Veo 3.1 Fast | Fast Google video generation | Veo 3.1 Fast Reference |
| Seedance 1 Pro | Anime, stylized content | Seedance 1 Pro Reference |
| Wan 2.6 T2V | Text-to-video, versatile | Wan 2.6 T2V Reference |
| Wan 2.6 I2V | Image-to-video animation | Wan 2.6 I2V Reference |
| Sora 2 Pro | OpenAI's flagship video model | Sora 2 Pro Reference |
| Hailuo 2.3 | Fast image animation | Hailuo 2.3 Reference |
| Gen4 Aleph | Runway's professional video | Gen4 Aleph Reference |
📚 See all video models: Video Models Reference
Inputs
- Prompt (required) — Text describing the video
- Reference Image (optional) — Starting frame or style reference
- Audio (optional) — Some models accept audio input
Output
Video nodes output a video (🟢 green connection) that can flow to:
- Tool nodes (for processing)
- Other video nodes (for chaining)
Audio Nodes
Audio nodes generate music, speech, and sound effects.
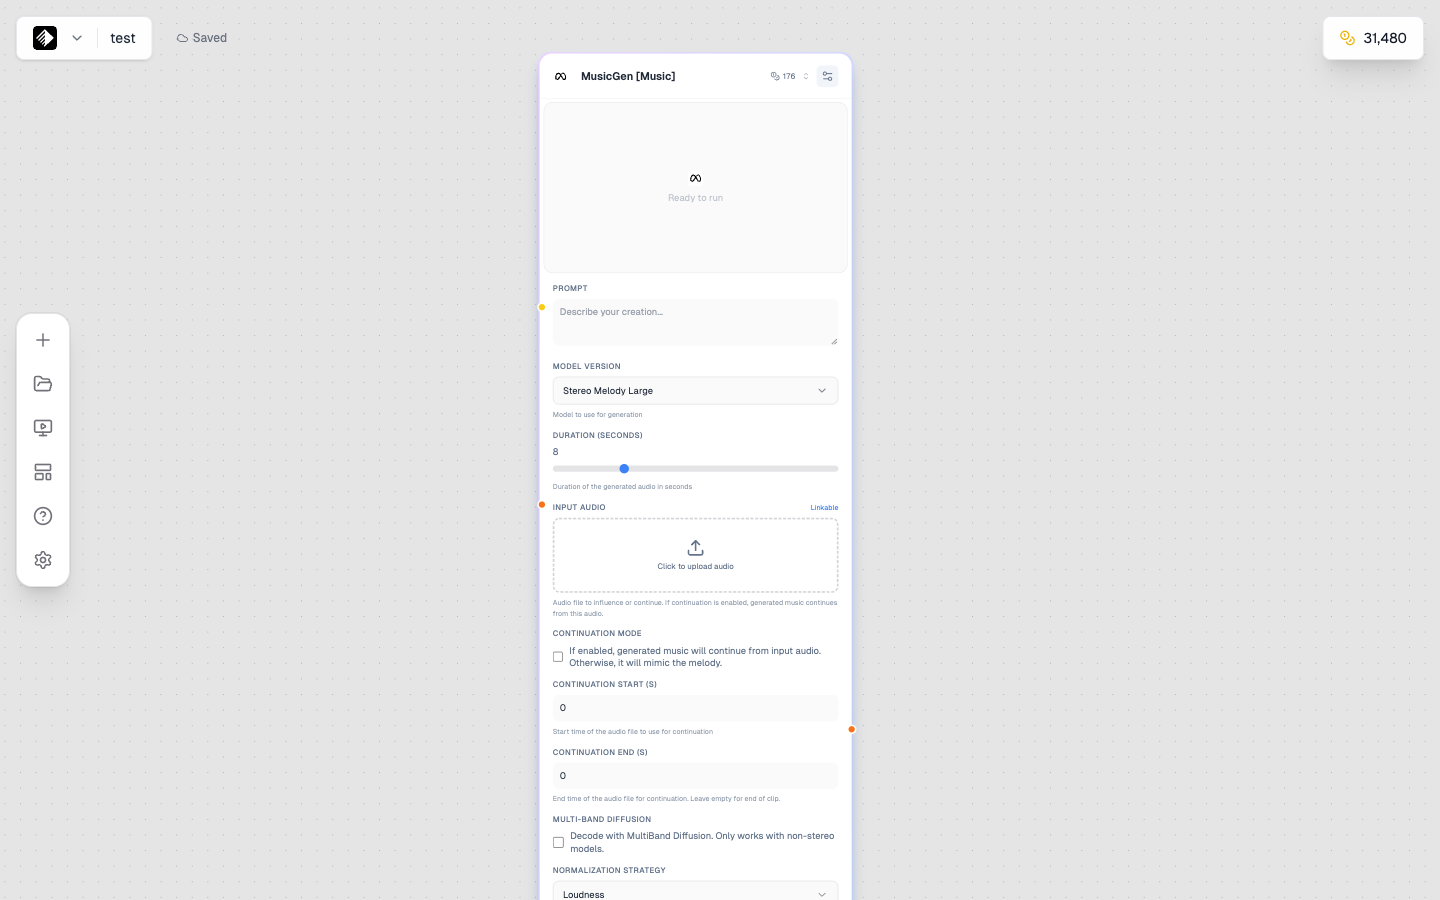
An Audio node using MusicGen for music generation.
Capabilities
- 🎵 Music generation
- 🗣️ Text-to-speech
- 🎙️ Voice cloning
- 🔊 Sound effects
Settings
| Setting | Description |
|---|---|
| Model | AI model (MusicGen, Speech-02, Lyria, etc.) |
| Duration | Audio length |
| Voice | Voice selection (for speech models) |
| Style | Music genre or mood |
Available Audio Models
| Model | Best For | Learn More |
|---|---|---|
| MusicGen | Music generation, versatile | MusicGen Reference |
| Music 1.5 | Advanced music generation | Music 1.5 Reference |
| Music-01 | Professional music creation | Music-01 Reference |
| Lyria 2 | Google's music model, high quality | Lyria 2 Reference |
| Speech-02 HD | High-quality text-to-speech | Speech-02 HD Reference |
| Speech-02 Turbo | Fast text-to-speech | Speech-02 Turbo Reference |
| Voice Cloning | Clone any voice | Voice Cloning Reference |
| XTTS-v2 | Multilingual speech | XTTS-v2 Reference |
📚 See all audio models: Audio Models Reference
Inputs
- Prompt (required) — Text description or script
- Reference Audio (optional) — For voice cloning or style matching
Output
Audio nodes output audio (🟠 orange connection) that can flow to:
- Video nodes (for adding sound)
- Tool nodes (for processing)
Upload Nodes
Upload nodes let you bring your own files into workflows.
Capabilities
- 📤 Upload images, videos, or audio
- 🖱️ Drag-and-drop support
- 📁 Use your own assets as AI inputs
Supported Formats
| Type | Formats |
|---|---|
| Image | JPG, PNG, WebP, GIF |
| Video | MP4, MOV, WebM |
| Audio | MP3, WAV, M4A |
Output
The output type depends on what you upload:
- Upload an image → 🔵 Blue (image) output
- Upload a video → 🟢 Green (video) output
- Upload audio → 🟠 Orange (audio) output
Use Cases
- 🖼️ Reference images for style transfer
- 🎬 Videos to transform
- 🎤 Audio samples for voice cloning
- 📷 Product photos to enhance
Tool Nodes
Tool nodes process and enhance existing content.
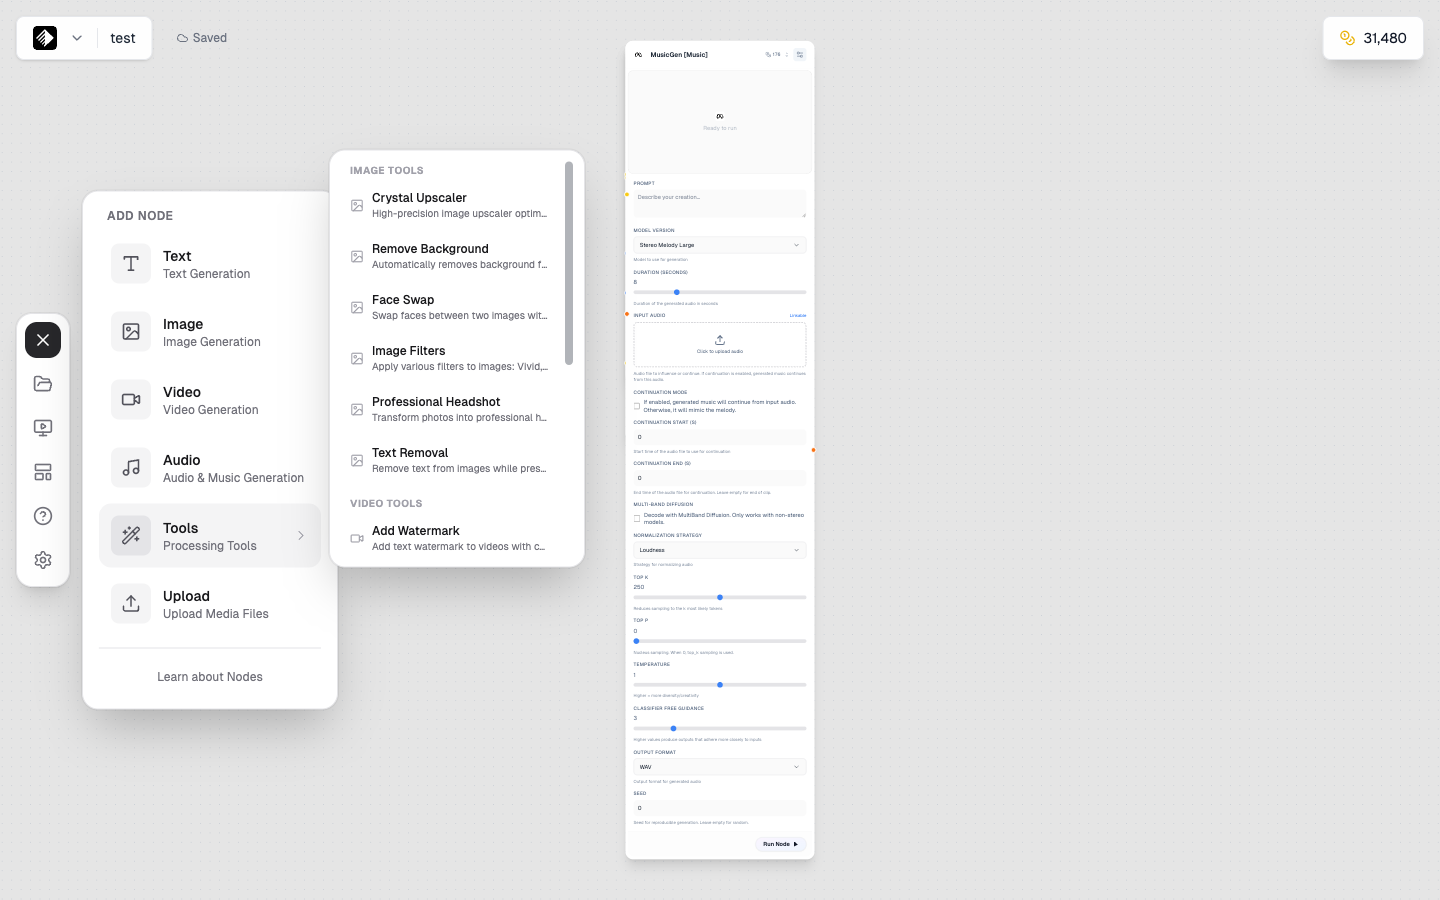
The Tools submenu showing Image Tools and Video Tools categories.
Available Image Tools
| Tool | Purpose | Learn More |
|---|---|---|
| Crystal Upscaler | Enhance image resolution up to 4x | Crystal Upscaler Reference |
| Remove Background | Remove backgrounds from images | Remove Background Reference |
| Face Swap | Swap faces between images | Face Swap Reference |
| Image Filters | Apply artistic effects and filters | Image Filters Reference |
| Professional Headshot | Transform photos into headshots | Professional Headshot Reference |
| Text Removal | Remove text from images | Text Removal Reference |
| Add Watermark | Add watermarks to images | Add Watermark Reference |
Available Video Tools
| Tool | Purpose | Learn More |
|---|---|---|
| Video Upscale [Runway] | Enhance video resolution | Video Upscale Runway Reference |
| Video Upscale [Topazlabs] | Professional video upscaling | Video Upscale Topaz Reference |
| Lip Sync Pro | Sync lips to audio | Lip Sync Pro Reference |
| Auto Caption | Generate video captions | Auto Caption Reference |
| Replace Character [Wan-2.2] | Replace characters in video | Replace Character Reference |
| Motion Transfer [Wan-2.2] | Transfer motion between videos | Motion Transfer Reference |
| Merge Videos | Combine multiple videos | Merge Videos Reference |
📚 See all tools: Tools Reference
When to Use Tools
- 🔍 Upscaling — Make images/videos larger and sharper
- ✂️ Background Removal — Isolate subjects
- 🎭 Face Swap — Replace faces in images
- 🎨 Filters — Apply artistic effects
- 📝 Captions — Add subtitles to videos
- 👄 Lip Sync — Match lips to audio
Connection Handles
Nodes have colored handles that indicate data types:
| Color | Data Type | Example |
|---|---|---|
| 🟡 Yellow | Text | Prompts, captions, scripts |
| 🔵 Blue | Image | Photos, graphics, art |
| 🟢 Green | Video | Clips, animations |
| 🟠 Orange | Audio | Music, speech, sounds |
Connection Rules
- Output to Input — Always connect from right (output) to left (input)
- Type Matching — Colors should generally match (🔵 blue to 🔵 blue)
- Text is Flexible — Text (🟡 yellow) can connect to most input types as prompts
- Some Nodes Accept Multiple Types — Check the input handles
Adding Nodes to Canvas
Method 1: Drag and Drop
- Open the node sidebar on the left
- Find the node type you want
- Drag it onto the canvas
Method 2: Click to Add
- Open the node sidebar
- Click on a node type
- It appears in the center of your view
Method 3: Context Menu
- Right-click on the canvas
- Select a node type from the menu
Node States
Nodes show different states:
| State | Appearance | Meaning |
|---|---|---|
| Idle | Normal | Ready to run |
| Running | Spinning indicator | Currently generating |
| Complete | Shows result | Generation finished |
| Error | Red indicator | Something went wrong |
Best Practices
Start Simple
Begin with basic two-node workflows:
- Text → Image
- Upload → Tool
- Text → Video
Plan Your Flow
Before adding nodes, think about:
- What's your input? (text, image, etc.)
- What's your desired output?
- What processing steps are needed?
Keep It Organized
- Arrange nodes left-to-right
- Leave space between nodes
- Name your canvases descriptively
Next Steps
Now that you understand nodes, learn about:
- The Canvas Editor — Master the full workflow environment
- Connecting Nodes — Build complex workflows
- AI Models Overview — Understand how AI models work in Armox
AI Models Reference
Explore detailed documentation for each AI model:
- Text Models — GPT-5, Claude, Gemini, and more
- Image Models — Flux, Nano Banana Pro, SDXL, and more
- Video Models — Kling, Veo, Sora, and more
- Audio Models — MusicGen, Speech-02, Lyria, and more
- Tools — Upscalers, background removal, and more