
The Canvas Editor
The Canvas is where the magic happens in Armox. It's a visual, node-based editor where you connect different components to create powerful content generation workflows.
What is the Canvas?
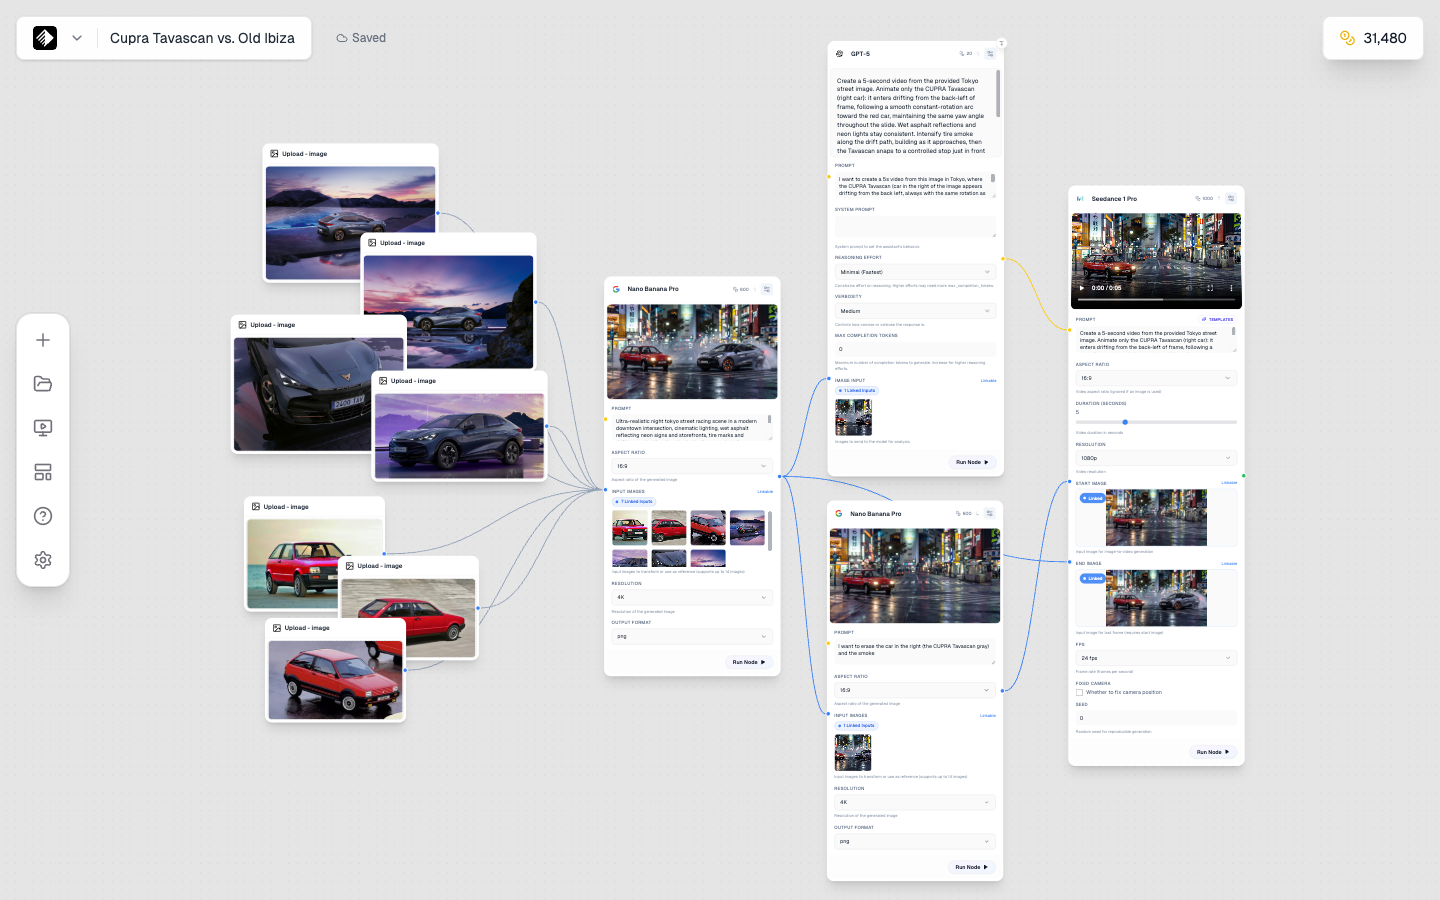
The Canvas editor with a complete workflow: multiple nodes connected to create a content generation pipeline.
The Canvas is Armox's visual workflow editor. Instead of writing code or using complex interfaces, you:
- 🎨 Drag and drop nodes onto a visual canvas
- 🔗 Connect nodes with simple lines
- ▶️ Run workflows with a single click
- 👀 See results directly in the canvas
Think of it like a flowchart that actually runs—each box does something, and the lines show how data flows between them.
Canvas Interface Overview
When you open a Canvas, you'll see:
| Area | Purpose |
|---|---|
| Main Canvas | Your workspace with grid background |
| Left Sidebar | Node types to add |
| Top Toolbar | Canvas name, save, run all, settings |
| Minimap | Overview of your entire canvas (bottom right) |
| Right Panel | Node settings when a node is selected |
Navigation
Zooming
- Scroll wheel — Zoom in and out
- Pinch gesture — On trackpad
- Zoom controls — In the toolbar
Panning
- Click and drag — On empty canvas space
- Middle mouse button — Click and drag
- Spacebar + drag — Alternative method
Minimap
The minimap in the bottom-right shows your entire canvas:
- Click on the minimap to jump to that area
- Drag the viewport rectangle to navigate
- Toggle the minimap on/off in settings
Creating a New Canvas
- Click Canvas in the sidebar
- Click + New Canvas
- Enter a name for your canvas
- Start adding nodes!
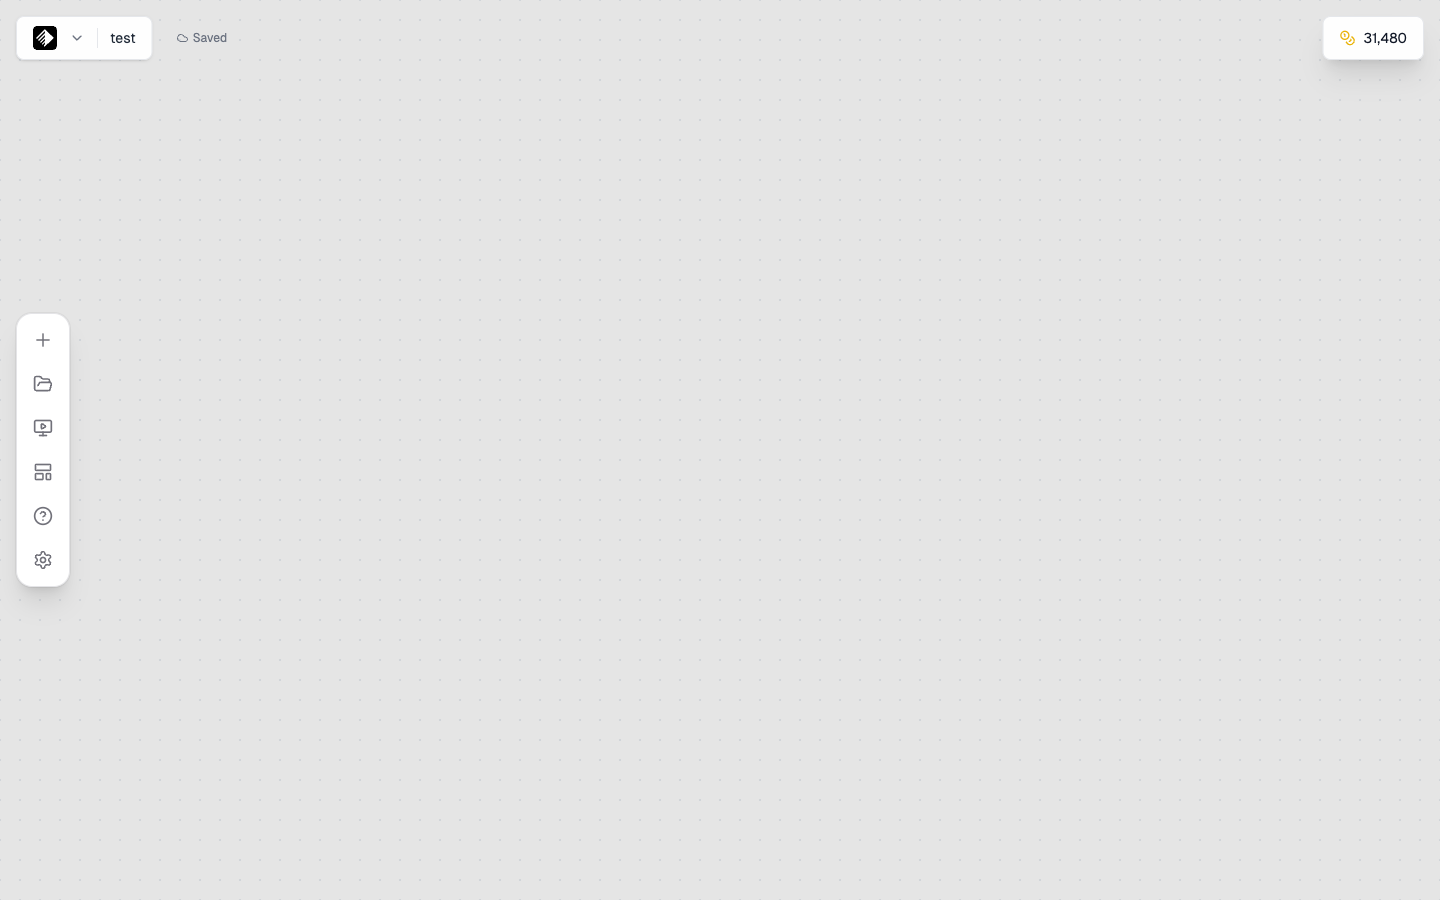
A fresh, empty canvas ready for your workflow.
Your canvas auto-saves as you work.
Adding Nodes
From the Sidebar
- Open the left sidebar (click the menu icon if hidden)
- Browse node categories:
- Text — For prompts and text generation
- Image — For AI image generation
- Video — For AI video generation
- Audio — For music and speech
- Upload — For your own files
- Tools — For processing and enhancement
- Drag a node onto the canvas, or click to add
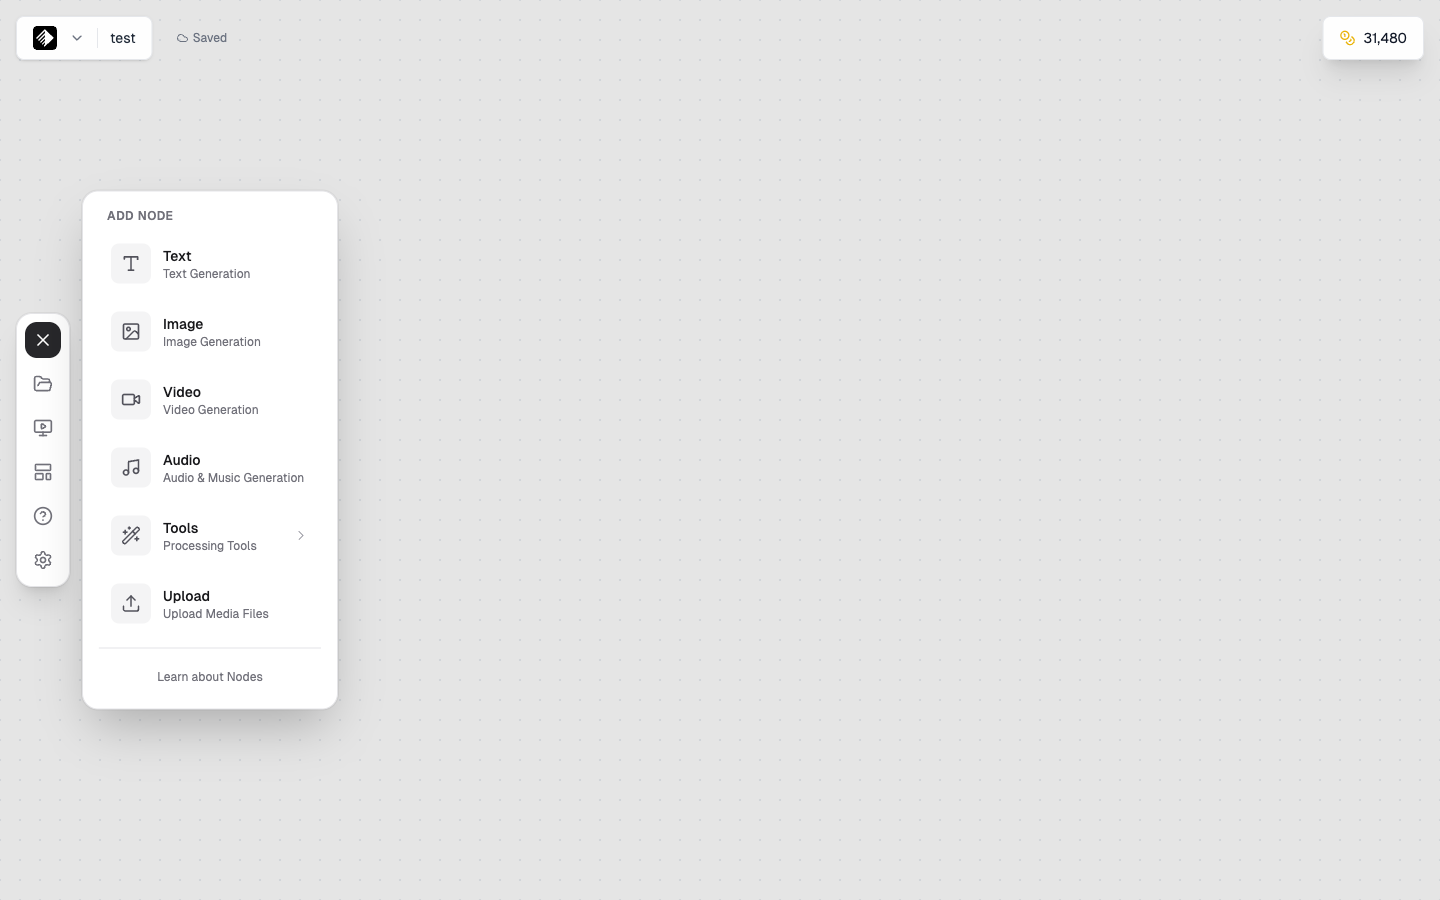
The Add Node panel showing all available node types organized by category.
Quick Add
- Right-click on the canvas for a context menu
- Select a node type to add it at that location
Selecting Nodes
Single Selection
- Click on a node to select it
- Selected nodes show a highlight border
- The right panel shows node settings
Multiple Selection
- Shift + Click — Add to selection
- Drag a box — Select multiple nodes at once
- Ctrl/Cmd + A — Select all nodes
Moving Nodes
- Drag selected nodes to reposition
- Arrow keys — Nudge selected nodes
- Multiple selected nodes move together
Connecting Nodes
Creating Connections
- Find the output handle (small circle on the right side of a node)
- Click and drag from the output handle
- Drag to an input handle (left side of another node)
- Release to create the connection
Connection Colors
Connections are color-coded by data type:
| Color | Type | Example |
|---|---|---|
| Yellow | Text | Prompts, descriptions |
| Blue | Image | Photos, graphics |
| Green | Video | Clips, animations |
| Orange | Audio | Music, speech |
Deleting Connections
- Click on a connection line to select it
- Press Delete or Backspace
- Or right-click and select "Delete"
Node Settings
When you select a node, the right panel shows its settings:
Common Settings
| Setting | Description |
|---|---|
| Model | Which AI model to use |
| Prompt | Text input (for AI nodes) |
| Aspect Ratio | Output dimensions |
| Quality | Output quality level |
Collapsible Sections
Settings are organized in collapsible sections:
- Basic — Essential settings
- Advanced — Fine-tuning options
- Output — Preview and download
Running Workflows
Run a Single Node
- Select the node you want to run
- Click the ▶ Play button on the node
- Watch the progress indicator
- See the result in the node's preview
Run Entire Workflow
- Click Run All in the toolbar
- Nodes run in order based on connections
- Each node shows its progress
- Results appear as each node completes
Execution Order
Nodes run in dependency order:
- Nodes with no inputs run first
- Then nodes that depend on those outputs
- Continue until all nodes complete
Viewing Results
In-Node Preview
Generated content appears directly in the node:
- Images — Thumbnail preview
- Videos — Video player
- Audio — Audio player
- Text — Text display
Full Preview
- Click on the preview to see it larger
- Download button to save to your computer
- Content is also saved to your Gallery
Saving and Organizing
Auto-Save
Canvases auto-save as you work. You'll see a "Saved" indicator in the toolbar.
Manual Save
- Press Ctrl/Cmd + S to force save
- Or click Save in the toolbar
Renaming
- Click the canvas name in the toolbar
- Type a new name
- Press Enter
Organizing Canvases
- Create descriptive names
- Use naming conventions (e.g., "Client - Project - Version")
- Delete old canvases you no longer need
Keyboard Shortcuts
| Action | Shortcut |
|---|---|
| Save | Ctrl/Cmd + S |
| Undo | Ctrl/Cmd + Z |
| Redo | Ctrl/Cmd + Shift + Z |
| Select All | Ctrl/Cmd + A |
| Delete Selected | Delete / Backspace |
| Zoom In | Ctrl/Cmd + Plus |
| Zoom Out | Ctrl/Cmd + Minus |
| Fit View | Ctrl/Cmd + 0 |
| Pan | Spacebar + Drag |
Canvas Best Practices
Layout Tips
- Flow left to right — Inputs on left, outputs on right
- Leave space — Don't crowd nodes together
- Group related nodes — Keep similar functions near each other
- Use the minimap — For navigating large workflows
Workflow Tips
- Start simple — Begin with 2-3 nodes, then expand
- Test incrementally — Run nodes one at a time to verify
- Save often — Even though auto-save works, manual saves help
- Name clearly — Use descriptive canvas names
Performance Tips
- Don't overload — Very large canvases may slow down
- Run selectively — Only run the nodes you need
- Clean up — Delete unused nodes and connections
Troubleshooting
Canvas Won't Load
- Refresh the page
- Check your internet connection
- Try a different browser
Nodes Won't Connect
- Check that types are compatible (colors match or text to anything)
- Ensure you're dragging from output to input
- Try deleting and recreating the connection
Results Not Appearing
- Check that the node finished running (no spinner)
- Look for error messages on the node
- Verify your credit balance
Next Steps
Now that you know the Canvas, dive deeper into:
- Connecting Nodes — Build complex workflows
- Running Workflows — Execute and manage your creations
- Creating Apps — Turn workflows into reusable Apps